Template:Needs editor update Files like images and sound clips are an integral part of wikias. They allow readers to get a sense of the information in pages with visual guides. To do this, you must first upload files to the wikia where you want to use them. You must be logged in to do this.
The instructions below are for the standard Wikia editor. For information on uploading files using the new VisualEditor, please see Help:VisualEditor.
Step by step
There are a few different methods you can use to upload files. Some are a bit more complex, but each one leads to the same result: populating your pages with visuals!
Edit mode
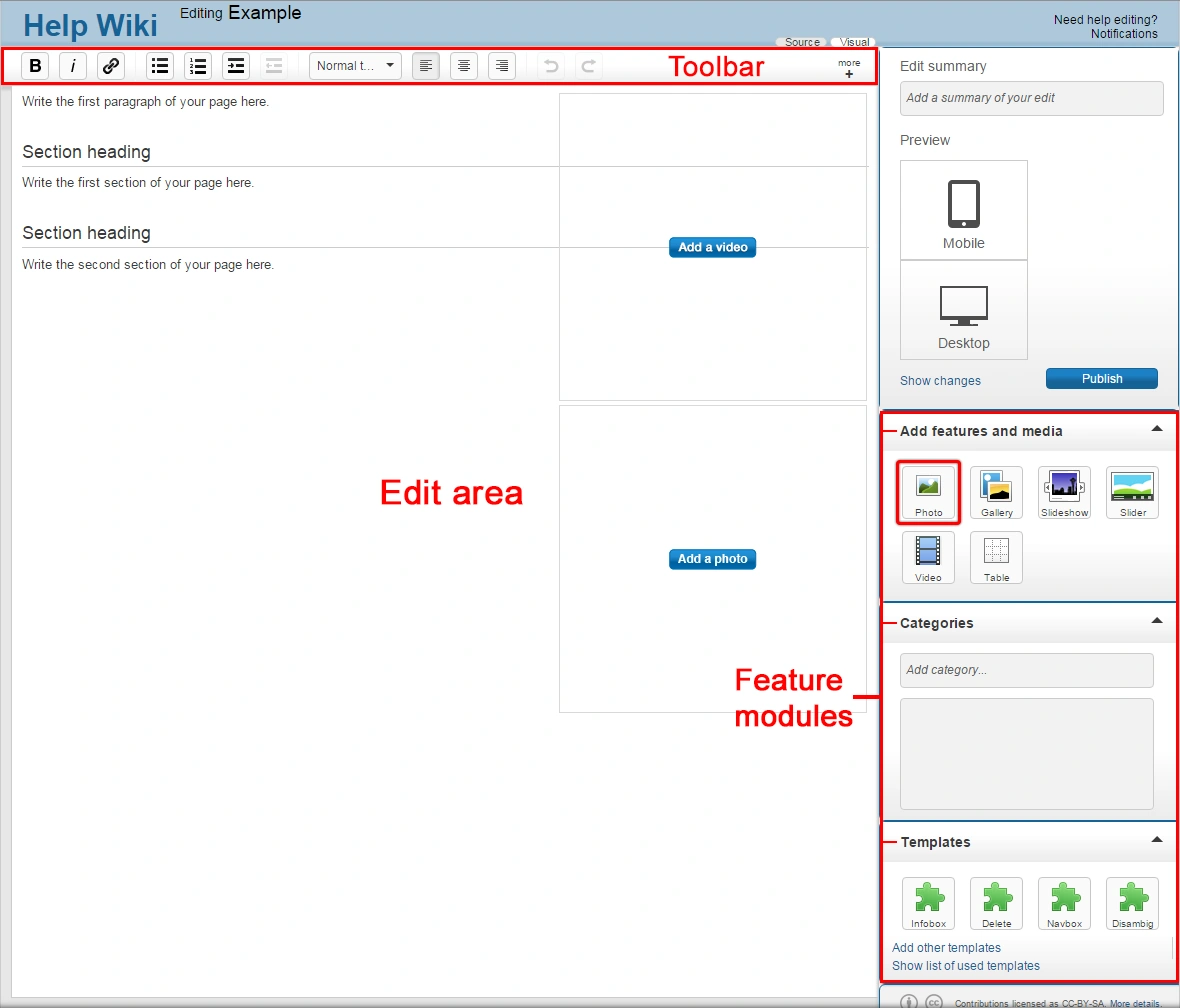
The easiest method is inserting an image directly via the editor.
- Click "Edit" on the article you are adding the file to.
- Click on the image upload button on the toolbar. It appears as a picture with a brown frame (see image below) in the right rail toolbar.
- When the pop-up box appears, you can upload an image from your computer. Additionally, you can find images already on the wikia to add to the article, as well as images on Flickr.
- On the next screen, you will be prompted to customize the image's size, choose a layout, and provide a caption. You can also add the details of the image, such as a new name (if needed) and the licensing template.
- Click "Add photo" for the image to appear on the edit page. Images can still be modified in edit mode by hovering over the image and clicking "Modify", and a pop-up window will appear.
- Save your edit and you now have a picture on the page!
See also Help:Photos for more information on the tool.
Image placeholder
An additional method is the image placeholder, which are sometimes used on new articles.
- Placeholders can also be added to articles by typing
[[File:Placeholder]]in place of an image. - If this is used, click the "Add a photo" button in the center of the placeholder to open the image addition tool (similar to the editor tool).
Special:Upload
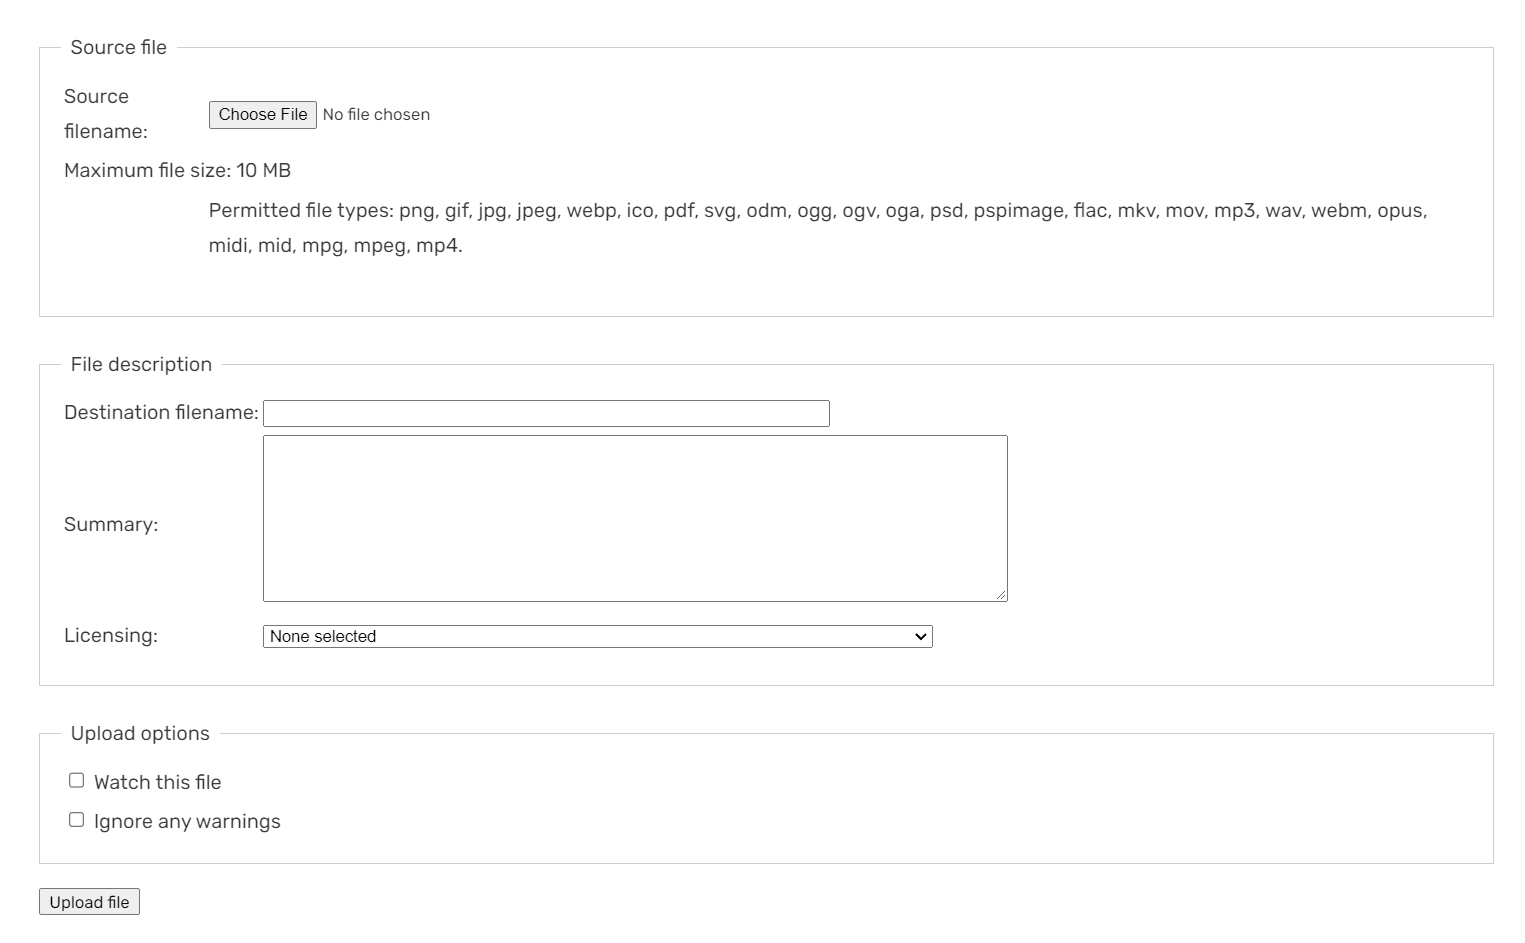
The 'Upload a file' page
Another method, though more complex, is Special:Upload. You can find this by typing it into the browser's URL bar or adding it to your toolbar.
- Click "Browse" next to the "Source filename" box to find the image on your computer.
- You can rename the image in "Destination filename" if you would like.
- In the "Summary" section, you can add a description and a source to the image.
- Select the license in the "Licensing" section.
- Click "Upload file" to upload an image to your wikia, and then place it into your article!
Some communities have customized the Special:Upload page, so be sure to take note of any local instructions.
Other questions
What file types are allowed on Wikia?
By default, file types that can be uploaded are .png, .gif, .jpg, .jpeg, .ico, .pdf, .svg, .odt, .ods, .odp, .odg, .odc, .odf, .odi, .odm, .ogg, .ogv, and .oga. Some wikias may allow additional file types on request.
If you would like to include a video on your wikia, please see Help:Videos.
How much can I upload?
The maximum size of uploads on Wikia is 10 MB. The maximum image resolution is 12.5 million pixels.
There is no limit to the number of files you can upload, but images and other files should be uploaded for use on the wikia - they shouldn't be used just as file stores!
Re-size an image
When uploading an image, it is okay to upload it at the largest legal size you can upload to the wikia. This is because the software will re-size the image that people see in articles to a more appropriate size without making them need to load the large image.
As a rough guide, it is recommended to use the JPEG format for photographic images, and PNGs for other 'simpler' images (such as game and cartoon screenshots).
See also
- Learn about uploading multiple images at once
- Learn about the image description page
- Learn about image copyright tags
Further help and feedback
- Browse and search other help pages at Help:Contents
- Check Fandom Community Central for sources of further help and support
- Check Contacting Fandom for how to report any errors or unclear steps in this article